The Materials Science Behind Convincing Rockwork

Most people, even a lot of contractors, look at a finished piece of scenic rockwork and think about it the way they think about a painting. They see the craft of it, the color and the texture, and they file it away as a skilled trade thing. What they miss is the engineering underneath the art, and that engineering is why some rockwork lasts 30 years and some starts failing at 5.  Rockwork is the marriage of traditional construction to the artistic construction trade and the two rarely see eye to eye.

Let me walk through the materials science the way I think about it on a real project, because this is not magic and it is not mystery. It is material behavior, understood and controlled.

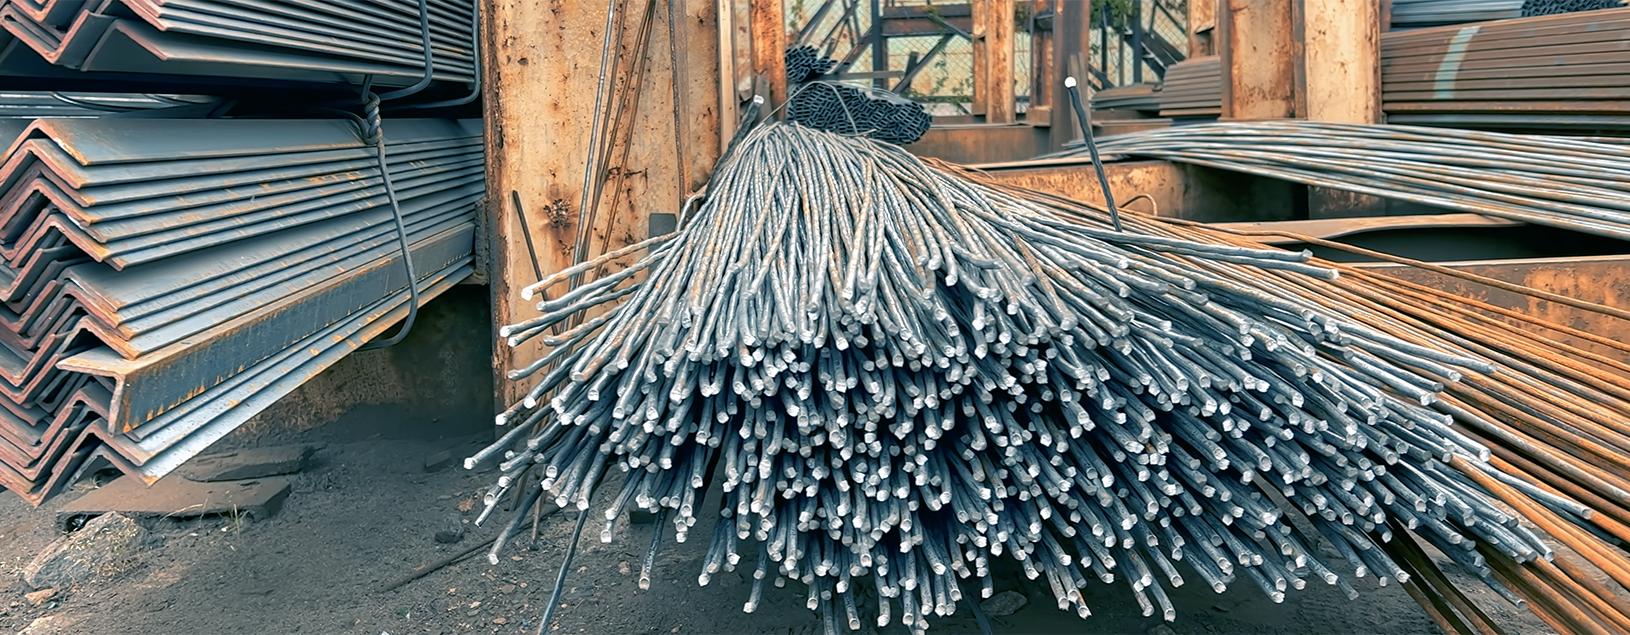
Aggregate Selection and Its Visual Impact

The aggregate, meaning the sand and gravel in your concrete mix, does more than add bulk. It directly affects the finished surface texture, the workability during sculpting windows, and the long-term durability of the piece. For scenic rockwork that will be exposed and detailed, we typically work with mixes that include finely graded aggregates in the surface layer, which allows the carving and texturing tools to produce clean, crisp detail without tearing, we refer to our references.

Coarser aggregate shows up in structural layers where you need mass and strength, not surface refinement. Getting this layering logic right is how you build something that is both structurally sound and visually convincing. If you are using one mix design all the way through, you are compromising somewhere, either in structure or in detail quality.

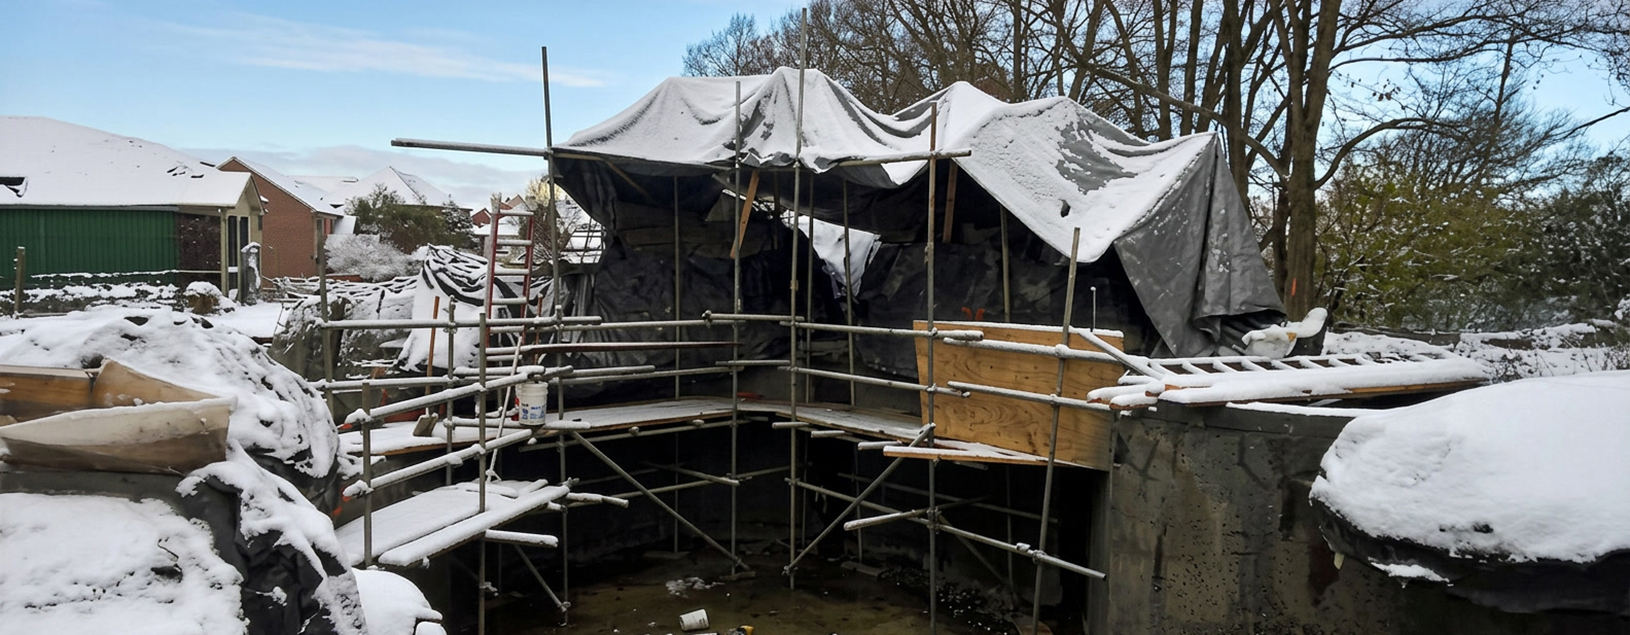
Mix Design and Admixtures

A concrete mix design for scenic work is not an off-the-shelf product. Water to cement ratio, admixture selection, retarders and accelerators, fiber reinforcement, these all get tuned to the project conditions. In hot climates, a retarder buys you working time so your sculpting windows do not collapse before the artist can get the detail in. In cold conditions, the calculus flips entirely and you may need accelerators and heat.

Pigmentation is another variable that people underestimate. Integral color, meaning pigment mixed throughout the concrete rather than applied only to the surface, creates a body color that reads differently than a surface-only paint system. When a rock chips or weathers, integral color does not expose a gray core. For environments where long-term realism matters, this is worth the added cost.

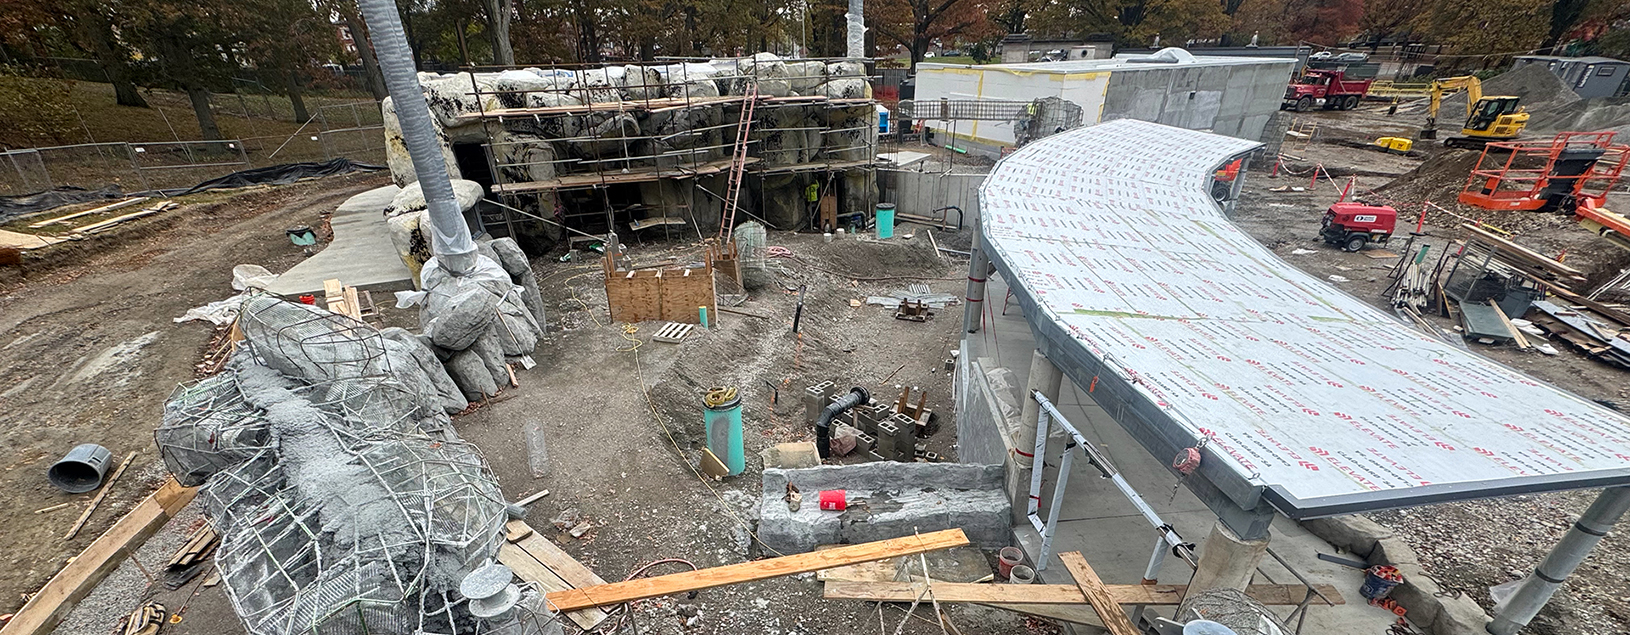
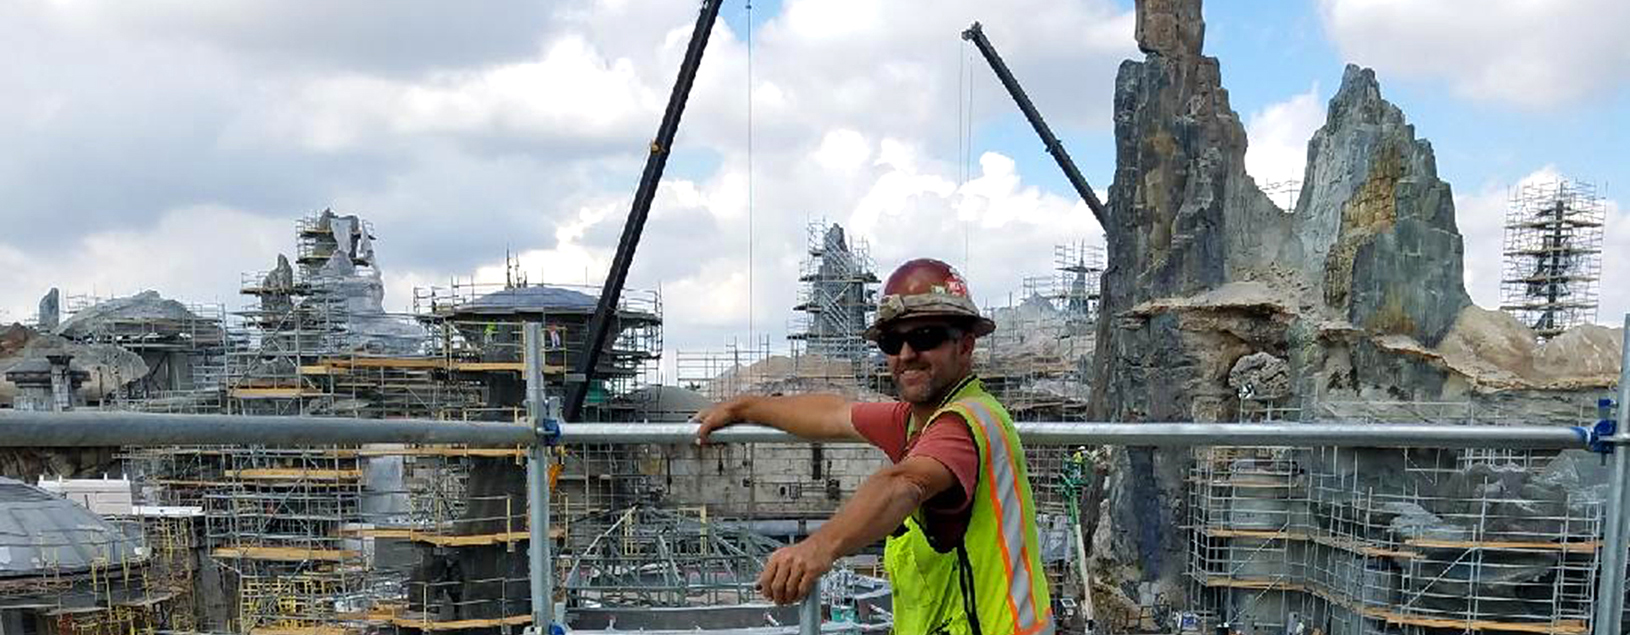
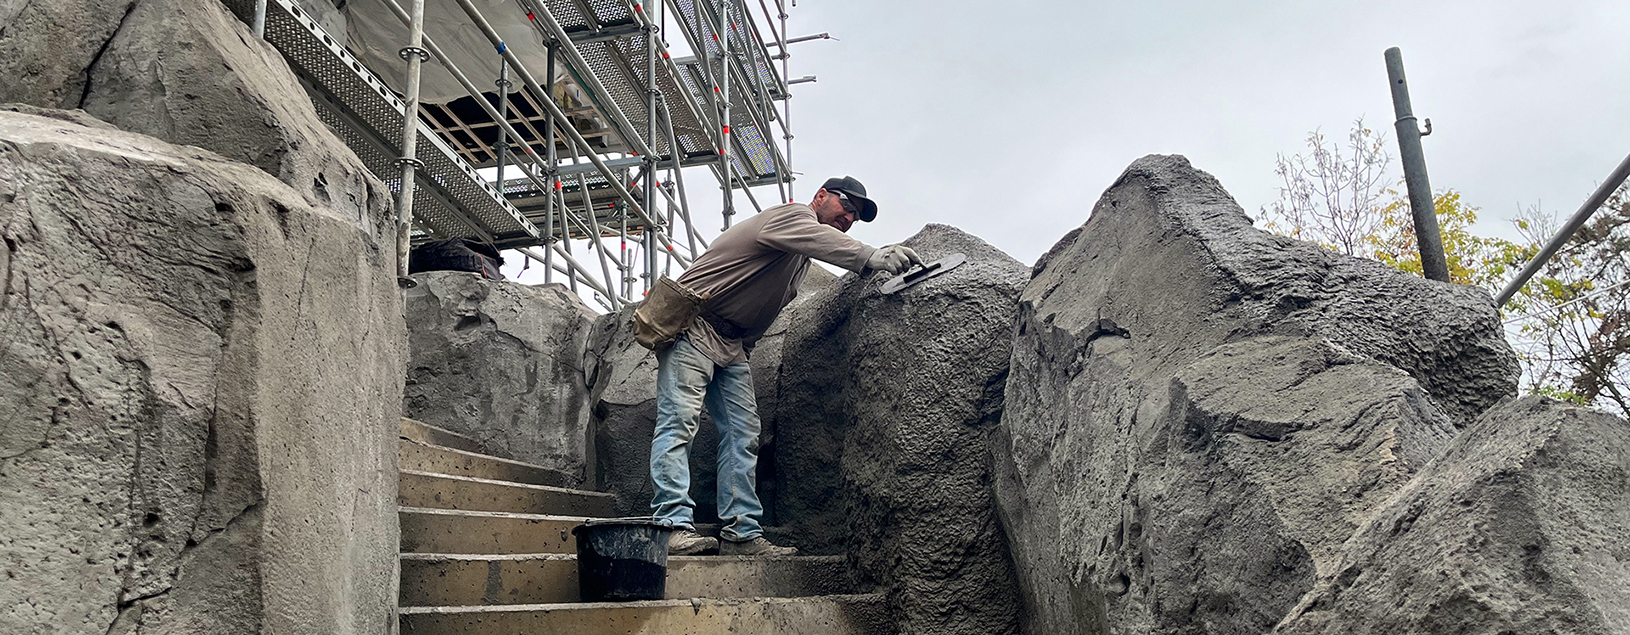
Structural Layering Strategy

A large scenic rockwork feature is not a single poured mass. It is a series of applied layers over a steel armature, each with a specific structural and visual function. The structure coat establishes adhesion and basic geometry. The finish coat or coats are where the surface detail is established and the real artistry begins!

Between layers, you have cure time considerations that are not optional. If you shoot over a coat that has not reached the right cure state, you compromise the bond. If you wait too long, you have to prepare the surface to receive the new coat properly. This is where experience becomes the real variable. No spec sheet tells you exactly what the conditions in front of you require. That comes from doing it.

Why Color Science Matters

Concrete is naturally alkaline and that alkalinity affects how certain pigments behave over time. Acid stains, for example, work by reacting chemically with the calcium hydroxide in the concrete surface. That reaction produces color that is truly part of the material rather than sitting on top of it. The result looks fundamentally different from a painted surface because it IS fundamentally different.

When we layer multiple colorants, each with different behavior and penetration depth, what results is the kind of tonal complexity that makes your eye read the surface as real rock. A single flat color, even a technically accurate one, reads as fake because real rock is not usually tonally uniform. The science of the color system is what closes the gap between a competent execution and a truly convincing one.

What This Means for a Client or Contractor

When you are evaluating bids on scenic rockwork, one of the questions worth asking is: what is your mix design approach and who is specifying it? The answer tells you a lot. A contractor who can articulate their aggregate selection rationale, their admixture strategy, and their layering protocol is working from an engineered system. A contractor who cannot is improvising. Both can produce something that looks okay at first glance. Only one of them is giving you something that will still look right in twenty years. Rockwork is a concerted effort and each step effects the next step.

This work is concrete and steel and pigment and chemistry, all working together. It is craft, yes, but craft built on a material logic. That is what we bring to every project at Authentic Environments. Rock on.

How Long Does Large-Scale Scenic Rockwork Actually Take to Build?

This is the question every project manager eventually asks, usually after the budget conversation and before the panic sets in. How long does this take? And the honest answer, which I know is not what anybody wants to hear, is that it depends. But let me tell you what it depends on, because that is actually useful information.

I have been doing this for 37 years. I have built everything from small garden grottos to multi-story cliff faces at major theme parks and resorts. The timeline variables are real and they matter, so let me break this down the way I would in a pre-construction meeting.

The Design and Engineering Phase

Before a single piece of rebar gets bent, you have design, engineering, and permitting. For a significant themed environment, you are looking at engineered drawings that show the steel schedule, review by a structural engineer, and submission to the city or jurisdiction where the work will be done. Depending on the complexity and the municipality, that review process alone can run four to eight weeks, sometimes more. This phase is non-negotiable and anybody who tells you they can skip it is setting you up for a very bad day down the road.

Steel Fabrication and Armature

Once permits are cleared, the crew goes in and builds the skeleton. For a medium-scale rockwork feature, say a themed pool grotto with waterfalls and surrounding cliffs in the 20 to 30 foot height range, armature construction can run two to four weeks depending on crew size, site access, and the complexity of the geometry. Tight sites, difficult access, and intricate structural forms all add time.

Shotcrete Application

Shooting concrete is weather-dependent. Temperature, humidity, wind, and the cure time windows between passes all govern the pace. On a well-run job with good conditions, a crew can move fast. One project I can point to directly was a resort waterfeature complex in the Southwest, roughly 4,000 square feet of sculpted rockwork surface area, that we took from armature to final shoot in about three weeks. That was a big crew, good weather, and a client who had the site logistics dialed in. That is the optimistic scenario.

When conditions turn, and they will, you adapt or you pay for it. Concrete does not wait on you to feel ready. Your windows of opportunity are always shrinking and you have to move. I have had crews pouring in 105 degree heat under shade tarps and I have had crews dealing with overnight freezes that required heated enclosures to protect fresh work. Both of those situations cost time and money. Plan for them.

Sculpture and Texture

After footings and the steel schedules are executed structural form is established to get the geometry correct with respect to the references given by the architect, Once all of that is signed off on the sculptural detailing can begin. This is where the rock really comes to life, the fracture lines, the stratification, the surface variation that makes the difference between something that reads as fake at twenty feet and something that makes you reach out and touch it because your brain refuses to accept it is concrete. For a 4,000 square foot surface, skilled sculpture can take two to four months depending on complexity and the number of artists on the crew.

Finish Paint and Color

The color phase is its own project within the project. You are doing base coats, washes, dry brushing, staining, glazing, and detail work in multiple passes. A realistic polychromatic rock finish on a large environment can easily run two to three weeks for a crew of experienced painters. Rush it and it will look rushed. There is no shortcut to a convincing rock finish.

Realistic Total Timelines

For a mid-scale themed environment, 2,000 to 5,000 square feet of rockwork surface area, you are realistically looking at four to six months from engineering through final paint, assuming no major weather delays, site access issues, or permitting holdups. Larger, more complex projects extend accordingly. I have worked on projects that ran 18 months of active construction.

If someone is quoting you large-scale scenic rockwork in six weeks start to finish, ask them what they are not doing. The answer will be instructive.

Time is a real part of the cost of this work. The clients who understand that get the best results. Let’s talk if you want to walk through a specific scope. I can give you a realistic picture fast.

What Material Is Used to Build Themed Environments?

People ask me this a lot, and I get it. You drive past a resort or a zoo or a themed attraction and you see these massive cliff faces or cave systems or jungle ruins and you think, what in the world is that made out of? The short answer is concrete. The longer answer is that it depends on the job, and getting it wrong is expensive.
Let me walk you through the material systems we use at Authentic Environments, because there is no single answer and anybody who tells you otherwise is oversimplifying.
Shotcrete and Gunite
The backbone of most large-scale scenic rockwork is shotcrete, which is concrete pneumatically applied through a hose at high velocity. There are two methods: wet mix, where the water is added before it goes in the hose, and dry mix, which is what we call gunite, where the water is introduced at the nozzle. Both have their place depending on the project, the climate, and what the structural engineer has specified.
Shotcrete bonds extremely well to steel armature, it can achieve significant thickness in a single pass when done correctly, and it is durable. We are talking about material that is going to be standing in the elements for decades. When it is done right, a shotcrete rock formation is essentially a reinforced concrete structure that just happens to look like it was carved by ten thousand years of erosion. That is the goal.
Steel Armature
Before any concrete goes anywhere, you need reinforcement For most commercial and large-scale work, that means a steel schedule engineered specifically for the project. Height, soil retention requirements, load-bearing considerations if there is a waterslide or a walkway involved, all of that drives the rebar schedule. This is not improvised. Engineered drawings get submitted and stamped. Inspectors sign off. It is a real construction project, not a craft project.
The armature is the skeleton. Get it wrong and nothing else matters.
Foam Core
Foam is used in this industry and I want to be fair about it because there are contractors out there doing good work with foam core construction. High-density foam can be shaped quickly and provides a substrate that can be shot or hand-applied over. For interior work or applications where weight is a real concern, it makes a lot of sense.
My honest take, and I have said this publicly, is that I would like to see foam rockwork drawings submitted to the city and stamped by an engineer the same way steel work is. The speed at which foam jobs can go up for large sums of money concerns me, not because the material is inherently wrong, but because the oversight conversation has not kept pace with the adoption. I am interested in hearing from contractors who have navigated that process. There is a legitimate place for this material in the toolkit.
Epoxy and Specialty Coatings
Once the structure and sculptural form are in place, the finish system is where the visual magic happens. We use a variety of epoxy-based coatings, integral pigments, acid stains, and specialty concrete paints depending on the look required. Achieving realistic rock coloration is not as simple as picking a color from a chart. You are layering translucent washes, building up base coats, working recesses differently than high points, replicating mineral deposits and weathering. It is its own art form on top of the structural art form underneath.
Some environments also incorporate hand-cast or pre-cast concrete elements, carved foam pieces, fiberglass components, or real salvaged stone to augment the built rockwork. Themed environments are rarely one material. They are a system of materials working together, and the skill is in knowing which tool to reach for and when.
The Bottom Line
If you are a developer, a project manager, or a general contractor trying to understand what goes into one of these builds, the material list is the easy part. The hard part is the 37 years of field experience that tells you how those materials behave in your specific climate, on your specific site, under your specific deadline pressure. That knowledge does not come in a brochure.
Reach out if you want to talk specifics. Happy to take you down the rabbit hole on this one!. Rock on!

Foam core verses Steel and backing for rockwork construction.

Lots to talk about on this subject!  Obviously there are pros and cons of each methods and nowadays the line has been blurred between the two.  I’ve seen foam with rebar reinforcement used and spaced out from the foam with bits of block and such.  I’ve also seen steel schedules shot and then foam thrown in and shot over for quick structural shape.  At any rate, some of these methods are approved and others are not..  I can say from experience as a contractor that the steel and backing method is widely accepted across the USA.  There are engineered drawing that show steel schedules for rockwork construction based on height, whether or not it will be retaining soil and what’s required for longevity of a slide.  Foam core I am not familiar with as I do not use this method as others do.  It concerns me that a foam job can be done so quickly for large amounts of money literally over the weekend or several days.  I’d like to see some foam drawings for rockwork construction submitted to the city where the build will take place and stamped by an engineer.  Im interested in what everybody has to say about this topic of conversation.  Please share your experiences for all to learn from.  Thanks and Rock on!

The Beauty of Chaos

Chaos applies to rockwork construction in a variety of ways, from armature all the way thru to sculpture and finish paint. Mother nature is a busy girl constantly changing things with all the forces she has at her disposal. Wind, rain, seismic activity and heat all have an impact on nature and in order to simulate nature effectively we have to use these activities to get the look and feel needed for our simulation.

When we see sunrises and sunsets or interesting cloud formations, we are awed by it. Coral reefs, jungles and forests all have this same effect, why? Because of the chaos of it, that is the attraction, we are drawn to it because it is out of control, beautiful, dangerous and sometimes even deadly!

Sooooo how do I get that into my work? What do I do to bring that beauty into my Earthy simulations? How do I make my rockwork more realistic?

The first thing that I would advise is the importance of references, never guess at it. Color and textures are revealed in the references, you will refer to them a heck of a lot more than you think. Possessing the actual piece of rock can also can also help by touching and feeling the surface.

Field trips around the project locale can be beneficial as well. This is a great opportunity to collect rocks, branches and photograph the objects you intend to simulate. A lot of students will just go crazy and photograph and collect everything! Be respectful and only gather what you need. I only photograph what I need for my color reference and for cracks and breaks, be selective.

Secondly, the references will only take you so far. The real question is why did that happen? What are the forces that made that a reality? Remember it is literally occurring right in front of you but at a pace you cannot identify with the exception of time-lapse or specialty photography.

We can expedite a lot of these forces with common tools that are on the job. We have water, we can assert pressure, we can apply wind and rip and tear. There are also a variety of chemicals to make concrete dry fast or slow. We can seed concrete with a variety of materials including integral colors. But how? And why? This is what you as a student have to come to terms with, discovery by trial and error will be your biggest learning tool. By using this method you will retain a lot of the information.

It would be easy to give recipes and show you moves to get the geometry of your sculpt right and things like that but you must learn by trial and error. Cause and effect is what you want to experiment with, I want to train you to think differently so that you will become great in your very own unique way. Remember there is no wrong way! Just a different way. So get to it!
R & D, research and development is your best friend.

I remember when I started out my mentor would take me on hikes, and one time we just hung out at the streams edge and moved rocks around and watched how the water would find a new way to flow! It was mesmerizing and I still remember it to this day.

I wish you the very best in your artistic endeavors.

Students and Controlled Environments

I love all the beautiful work students in our industry are producing! Beautiful mock ups, wonderful examples of wood and rock and even beautiful coloring.

Working in controlled environments however does not teach a student or group of students how to deal with adversity in the field, this, in my humble opinion is failure to train properly.
We have a lot of good trainers out there, many which bring students in on projects and the trade-off is learn while producing. This does not give the client the best work possible as students or inexperienced workers are learning the trade. Good for the students not so great for the client! This scenario does address the fact that ambient conditions can change the workflow and adjustments and/or concessions must be made.

When a light rain comes or it becomes windy or the temp exceeds 90 degrees, the artists have to adjust, wet tarps may be needed, tents are required or heaters are needed. I would emphasize the need for thinking on the fly because it is not always wonderful weather. Don’t get me wrong, there are days that are perfect for placing concrete, but usually there is some condition that must be dealt with either with chemicals, structures, heat or it can be as simple as a delay where everyone goes home with show up time.

My point is this, we need to teach students to expect the unexpected, let’s prepare them for challenges in the field. I would hate to see a group of artisans go in the field with wonderful ideas only to be destroyed because of a little bad weather! This art form can be controlled if you prepare for it.

You will not be working in a controlled environment all the time! There are conditions you must be prepared for. Painting rockwork in Arizona is different than doing it in Minnesota where your paint can freeze overnight and you’re out 5k and now behind schedule. That cost is on you!! But by careful planning a warm shed can keep paint at the proper temperature and that burden can be on your employer to provide this service releasing you from serious liability and expense! Remember, everything is a negotiation.

I remember one time a long time ago when I was coming up… We poured a slab and the latest greatest thing was a salt finish. Once the slab was floated out we would broadcast salt in it and finish as usual. It looked great everybody went home. The next day we discovered that the raccoons just love salt and spent the entire night digging it out! It was funny in a “It’s not my fault” kind of way, A major expense for the owner! It’s not easy but always try to expect the unexpected if you can help it. Experience teaches us, sometimes painfully.

I would like to add that concrete does not wait! Your windows of opportunity are always shrinking and you have to move quickly, sometimes no time for lunch or breaks! It’s a wild animal that needs constant supervision. The rewards are great though, it just takes patience. When a seeded slab looks beautiful or a chunk of sculpted rock is complete it can be the greatest feeling ever! This artwork can get in your blood, it did mine.

Watching the weather and news reports will aid you in your decision making. Concrete is a difficult business; concrete burns can happen causing serious bodily harm! These students must be made aware of the dangers and take precautions and use the PPE’s (Personal Protective Equipment) gloves, safety glasses, and back braces will protect students from the aches and pains some of us veterans are going thru now, like me! Advil is not a breakfast and lunch!

The Importance of Field Work and Research

Part of the fun of working in this trade is the unavoidable contact with the natural world. We draw inspiration from places, or from people or dreams and memories, but I enjoy getting out in the field and see the natural rock or waterfalls and try to recreate them as best I can. Mother nature can be a real tough teacher with her heat, rain, wind and bugs or freezing temperatures but if you can get past all that you will be awed at what can be seen out there or should I say inspired?

Pick up a branch and try to simulate it at a much larger scale and you will see it a lot differently than just giving it a passing glance, or how about a small stone that you will make as big as a house! It is easy to look at objects but a lot different if you are simulating it, I mean to say you will truly “see” it. It has always been amazing to me to have a piece of the natural work, i.e., rock, branch, root right in front of me as I work and I will constantly keep looking at it to answer questions like what color is first? What about the recesses? Is that a smooth or rough texture? Will the texture change? It just goes on and on and on!

Soon you will have bits and pieces of stuff all over your studio or house or bathroom ahem! Rocks, mushrooms, roots and fossils the list goes on. My wife has accused me of turning our home into a natural history museum. Point is, all of this will help your simulations look better.

It is important to not destroy or wreck the natural world in your pursuits. This trade has given birth to many pro-environment people, or animal activist and even new Zoo directors and curators, there is no end to where this trade can take you. Please be respectful of our natural world and only collect what can be taken without collateral damage.

Videography and photography are helpful tools as well, easily document color schemes and fracture patterns in rock. I have a very extensive library of photos and video that I use quite frequently. There is no limit or guides here, just take pictures and leave footprints, and if your really good no footprints, lol! Oh! One last thing, if your family comes along with you on one of your adventures be sure to take pictures of them too because they are much more important than sticks and rocks. Hike on brothers and sisters!

Let’s Create Together.

Get In Touch